
Here's a step-by-step guide to better manage custom networks on your Bybit Seed Phrase Wallet.
Note: You can download the Bybit Wallet Extension here.
Add Custom Network
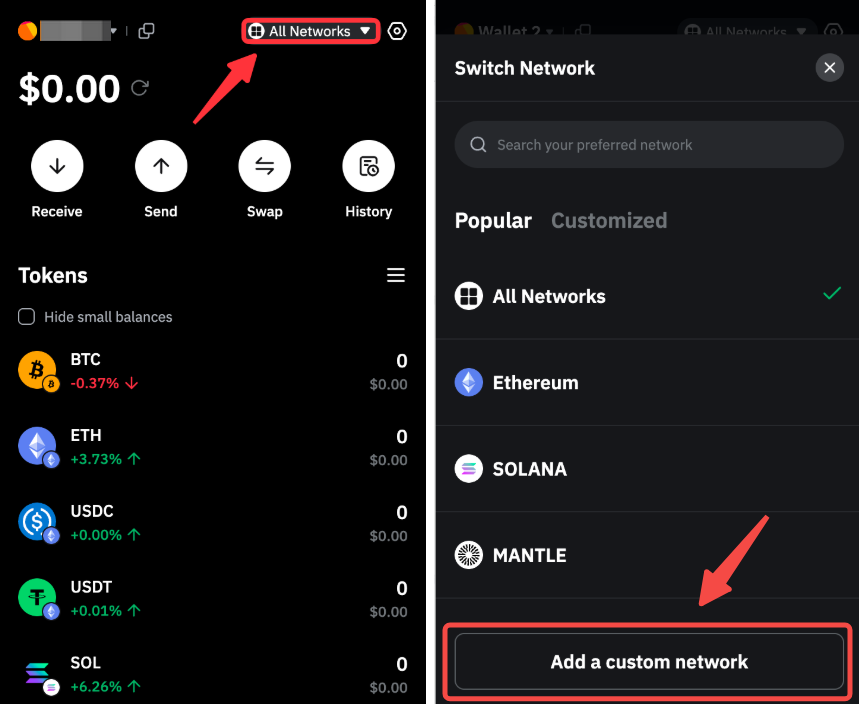
Step 1: To add a custom network, open the Bybit Wallet Extension and click on All Networks → Add a Custom Network.
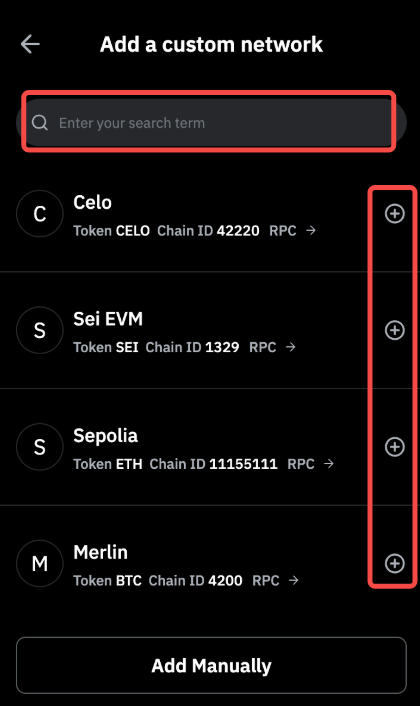
Step 2: Enter a valid network name and once you have found the network, tap on the + icon to add it to your wallet.
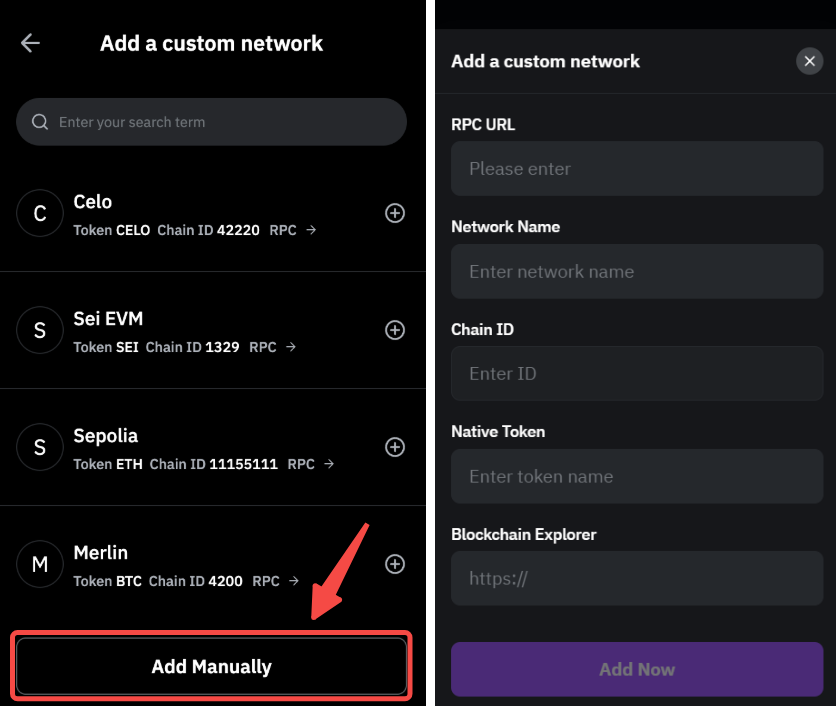
If you are not able to locate the network of your interest, you can click on Add Manually. Enter the necessary information and click on Add Now once done.
Notes:
— If the network you would like to add already exists in your Bybit Wallet, you won’t be able to add it as a custom wallet again.
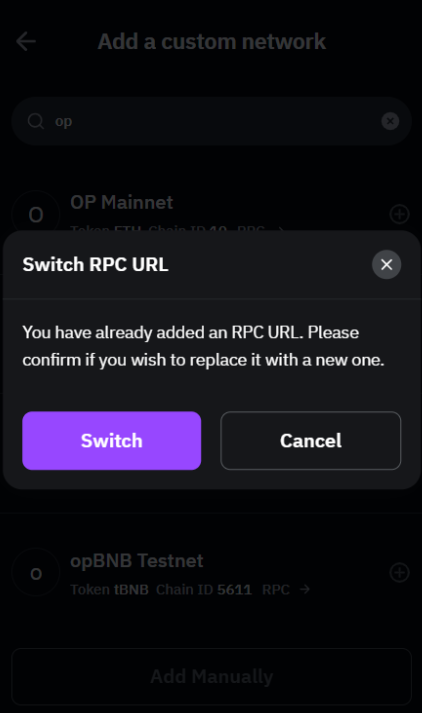
— Please ensure to enter the correct information related to your custom network as incorrect details may lead to loss of funds.
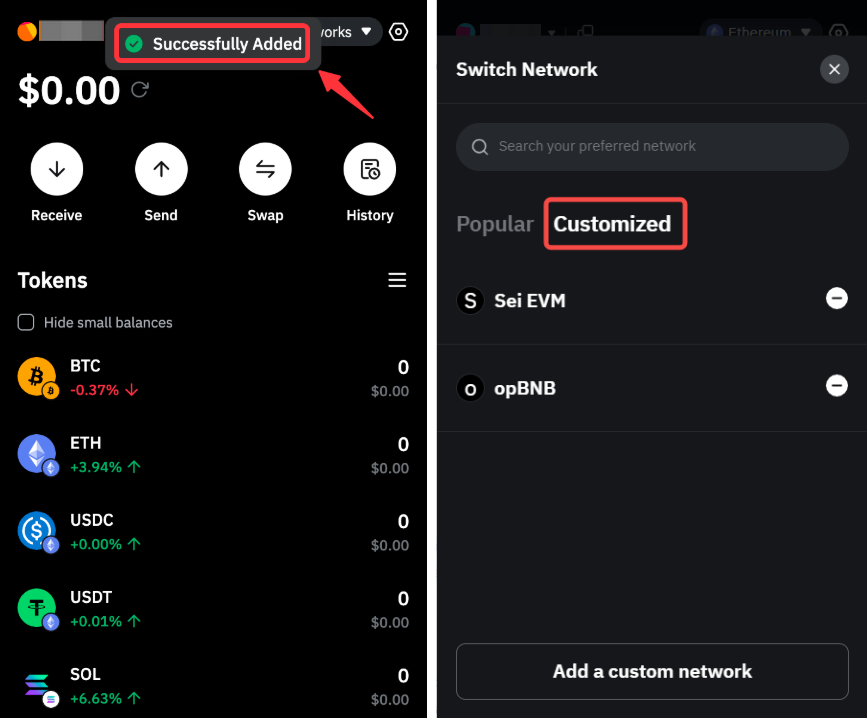
The network will be successfully added to your Bybit wallet. You can view all your Custom networks in the Customized tab of the Network page.
Switch to an Added Custom Network
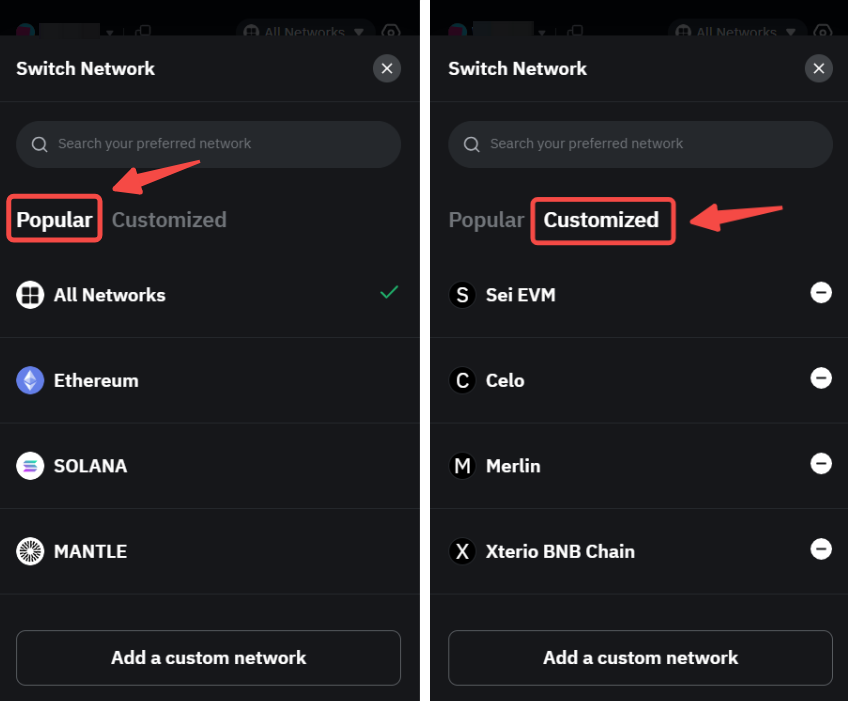
Step 1: Please click on Network in the extension. In the Popular tab, you will see all the networks added by default to your Bybit Wallet while the Customized tab will display all the custom networks you have added in your wallet.
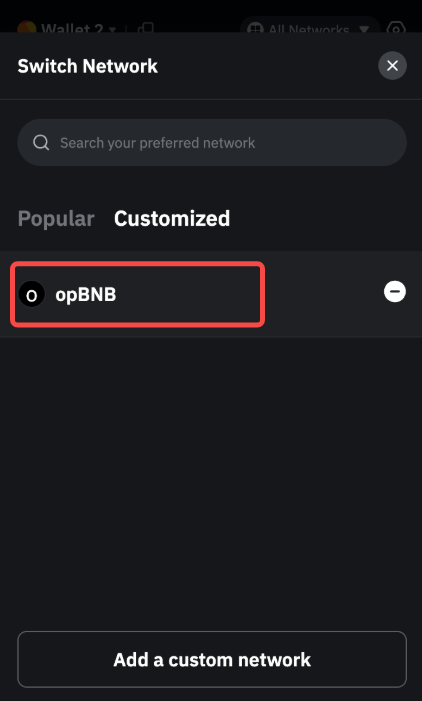
Step 2: Locate the custom network of your interest and click on it to switch to this network.
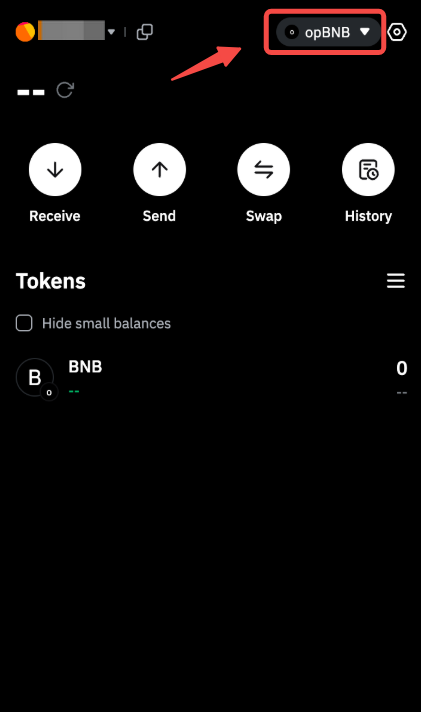
The network will be successfully viewed in your Bybit wallet.
Please note that you will need to add a smart contract address to view the tokens deposited.
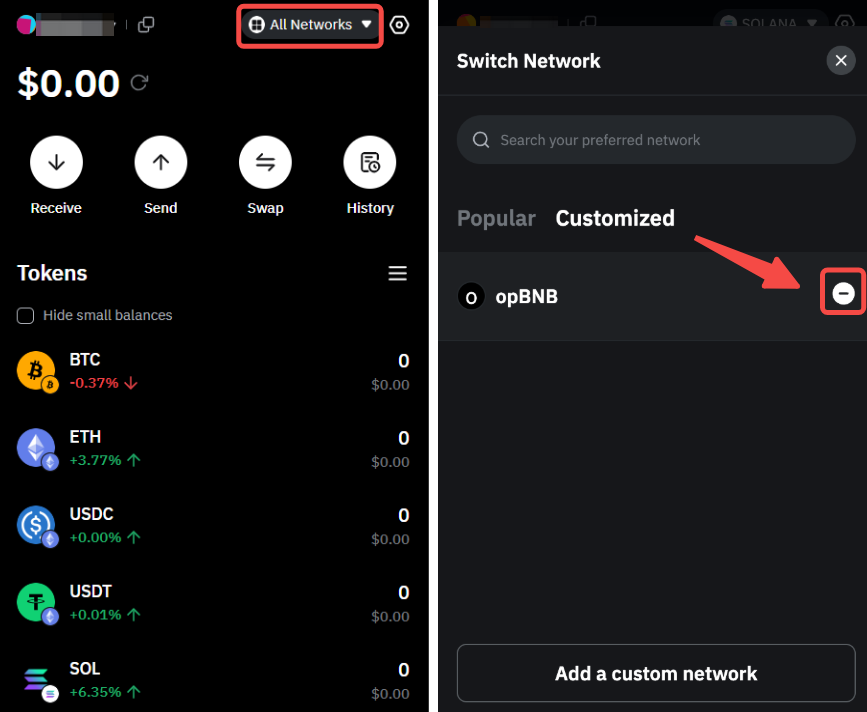
Remove Custom Network
Open the Network page and go to the Customized tab. Locate the network you want to remove and click on the (–) icon.
Notes:
— It is not possible to remove the networks added by default.
— You will need to switch to another network before you can remove a custom network.
The custom network has been successfully removed.